Since I purchased a new motherboard I have started using Intel RAID0 for 2xSamsung 840 Pro 256GB and 2xHitachi 1TB 2.5″ disks. Performance is great and everything worked well, until I had to reset my BIOS a few times because of overclocking. For some reason my second RAID0 array (On the Hitachi HDD’s) would always come up failed.
This was strange to me (I have a background in Storage) as there was no reason why the RAID would have failed. So I started investigating and I found a way to repair the situation without data loss.
After reading up on this problem (and finding a few helpful blogs, but mostly a lot of other people having the same problem) I was able to puzzle together a way to actually repair the failed RAID0 stipe and get it back again as it was before it “failed”. After doing some testing it turns out that when my BIOS resets itself it puts the controller back in AHCI mode. When you then go through the normal POST and it tries to run an operating system, for some reason it screws up one of the RAID0 sets. But in reality, nothing is wrong with it. I will highlight how to fix it in a series of screenshots below. Step wise we are going to do the following: – Reset disks to non-member – Re-create RAID disks with exact previous settings – Search drive for lost partition – Recover partition information and reboot This guide only works if the RAID that has failed is NOT your primary boot volume. Some steps in Windows will be required. If it is your boot volume, some alternative steps for the Windows portion will need to be found.
Steps in Screenshots
Rebooting after setting the controller back from AHCI to RAID results in the following situation, Enter the Configuration Utility using CTRL-I
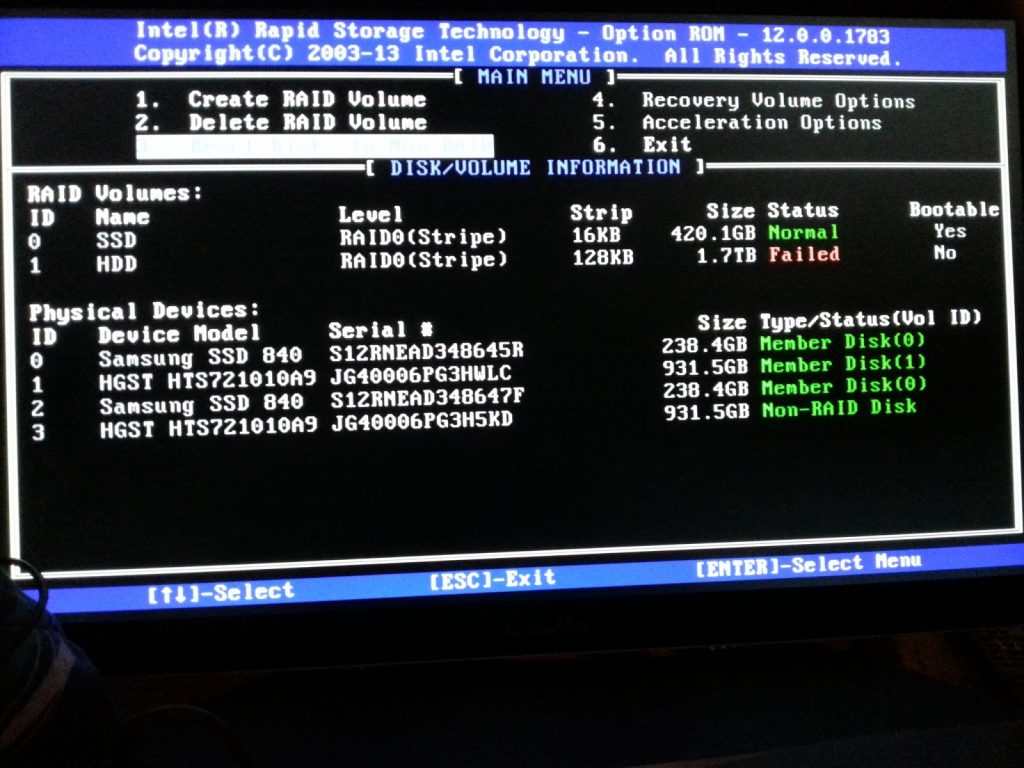
The following screen appears where you can clearly see on of the disks is now a “Non-RAID Disk”, incorrectly in our situation
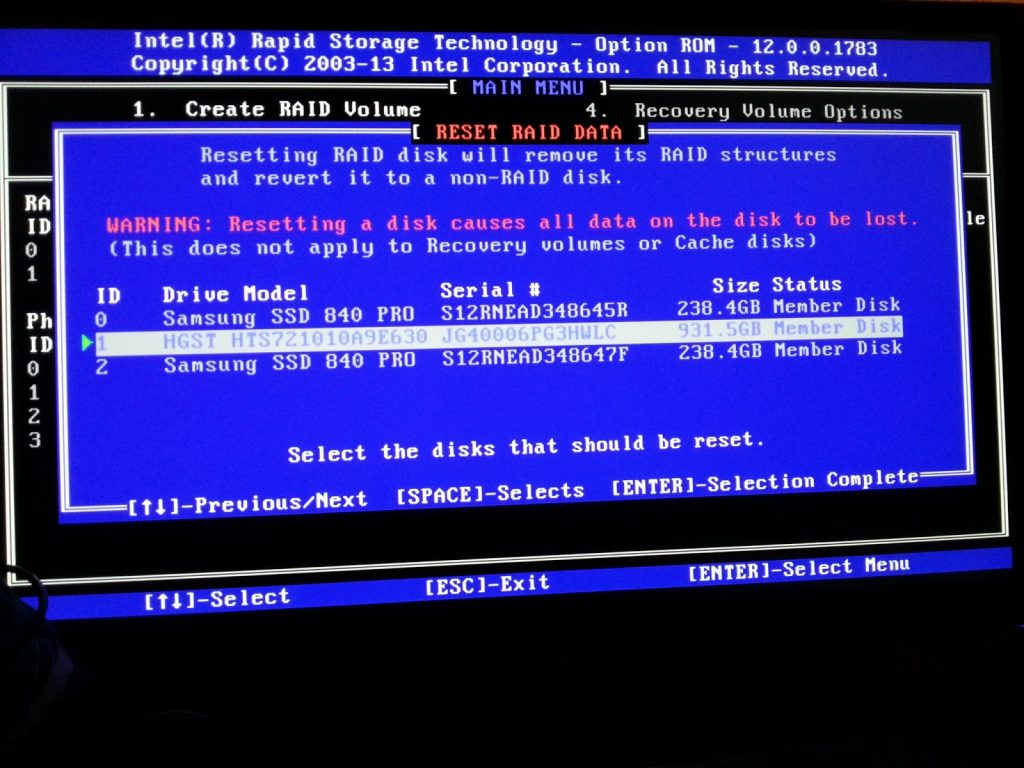
Select “Reset Disks to Non-RAID”
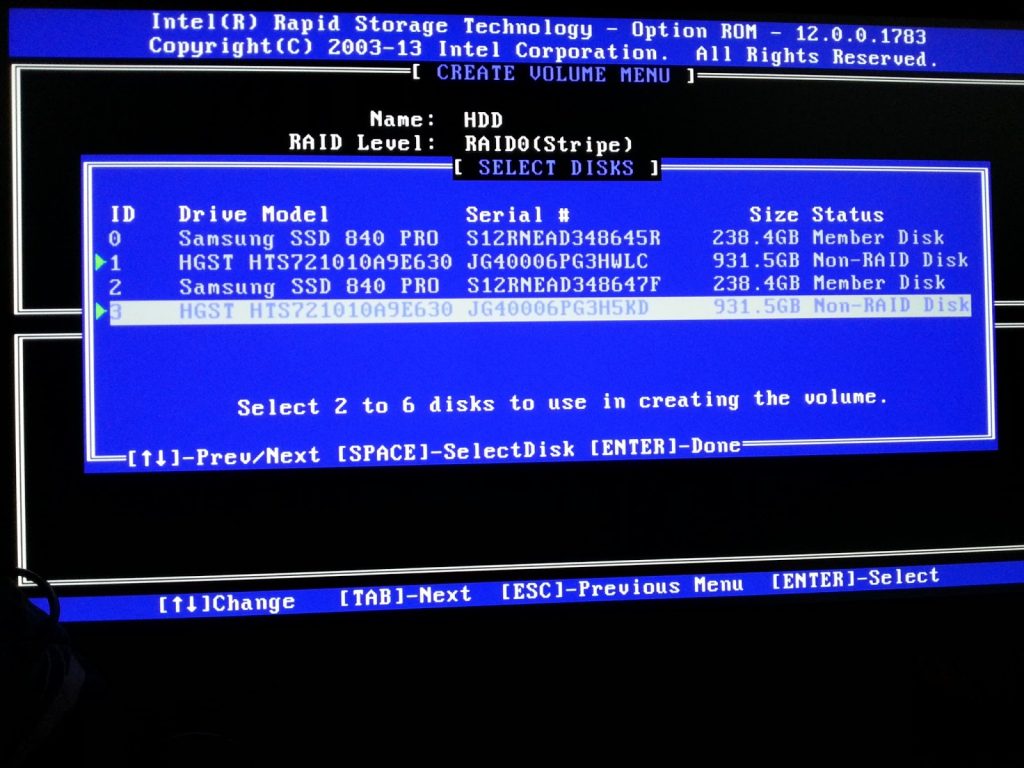
Select the other disk of the ‘failed’ RAID-group
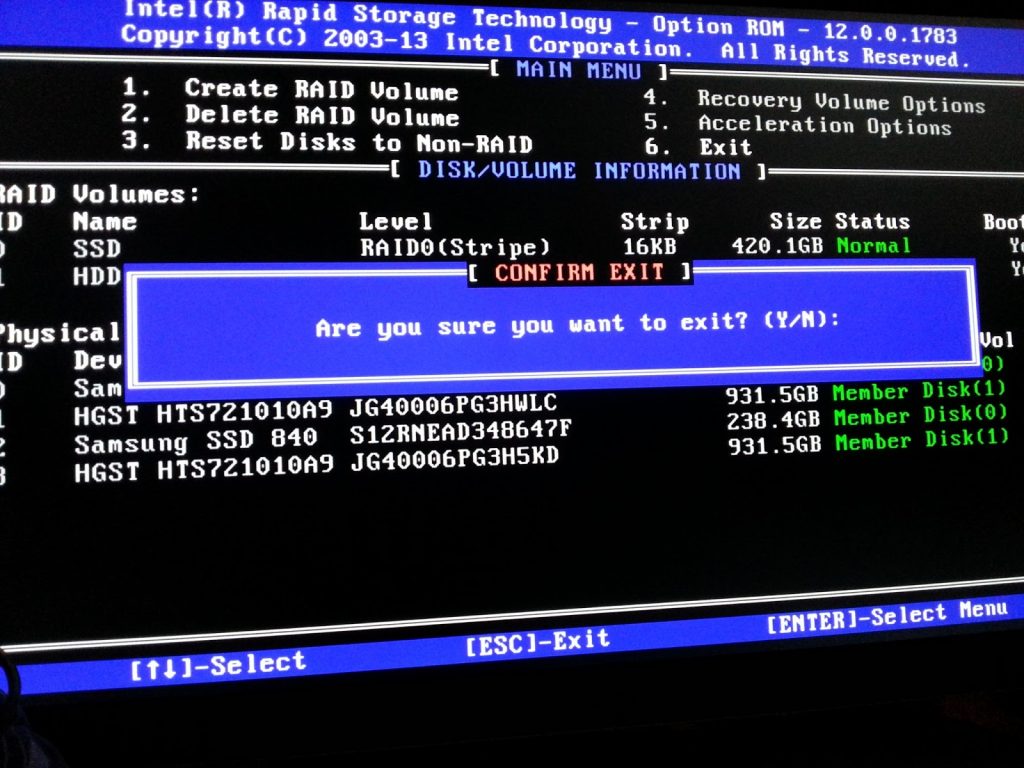
When selected, Hit Y and then hit Enter
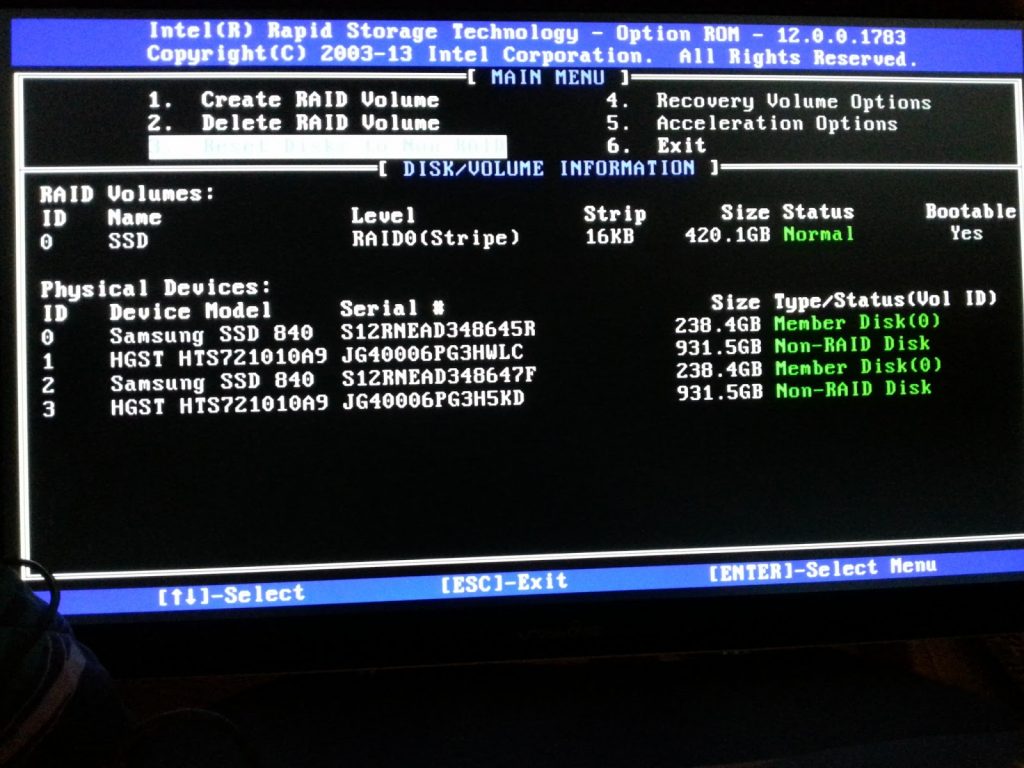
Now we have the disks both as “Non-RAID” Disks and we can start reconstructing the RAID configuration, this will NOT overwrite any data on disks except for the RAID configuration area (which was empty before already)
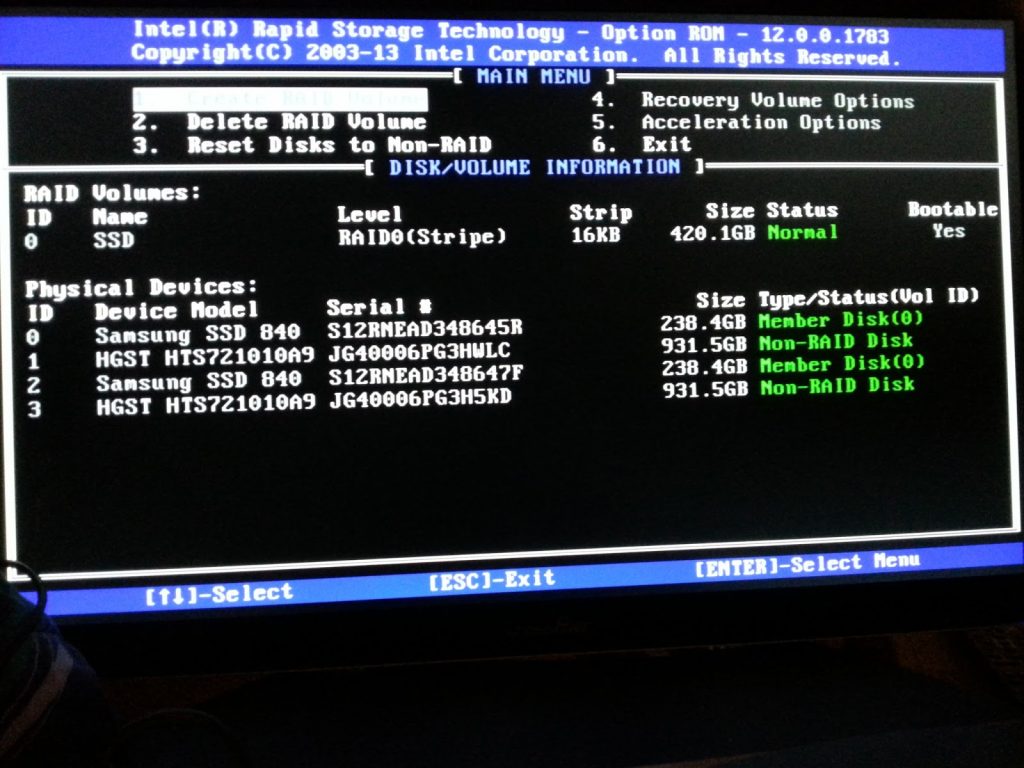
Select “Create RAID Volume”
Select the intended Disks
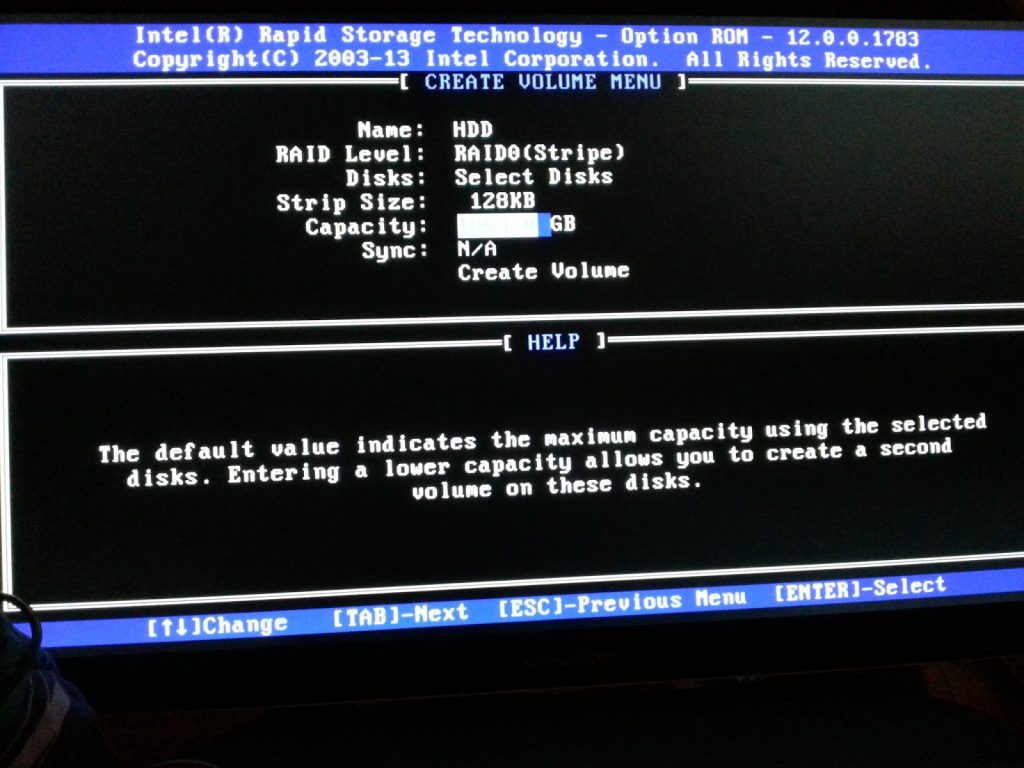
This is a bit of a tricky part, you need to select the EXACT same details as where selected before. You cannot deviate in RAID Level, Stripe Size or Capacity
For me, I always create RAID volumes slightly smaller then the actual capacity of the current disks. If you ever need to rebuild and use a disk from a different generation or manufacturer, sometimes they can be slightly smaller then the on you had. If you do not leave some free space you will be out of options, so as a tip, do not use it to full capacity! In my case I use 1800GB
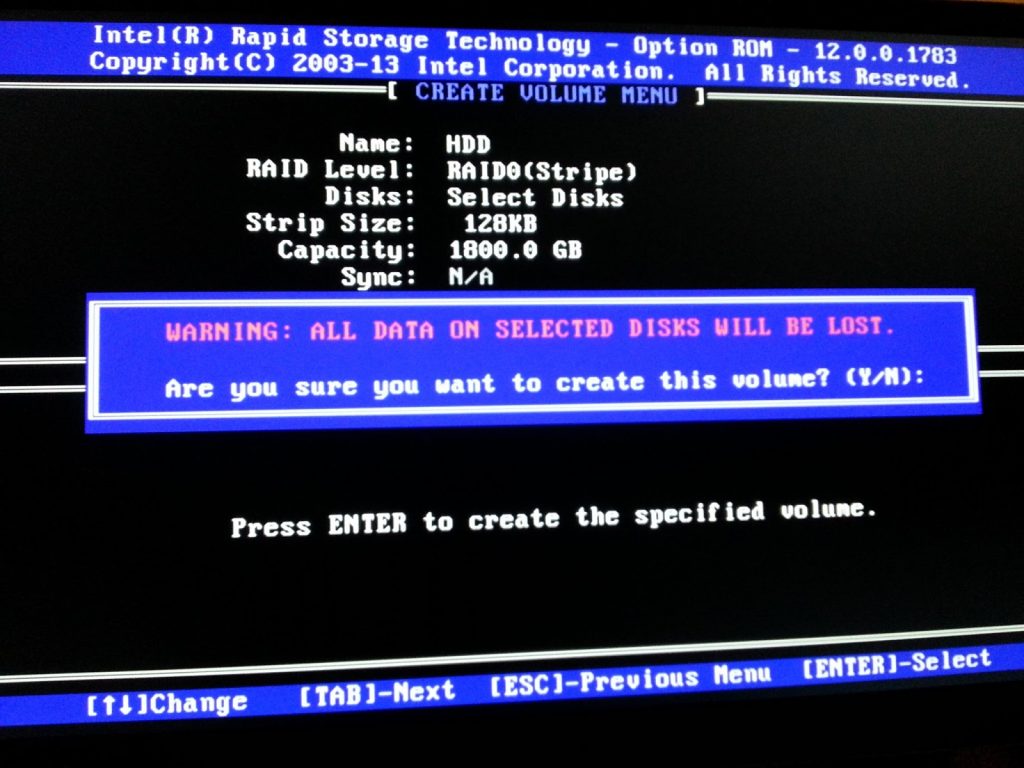
After filling in the correct values, create the RAID
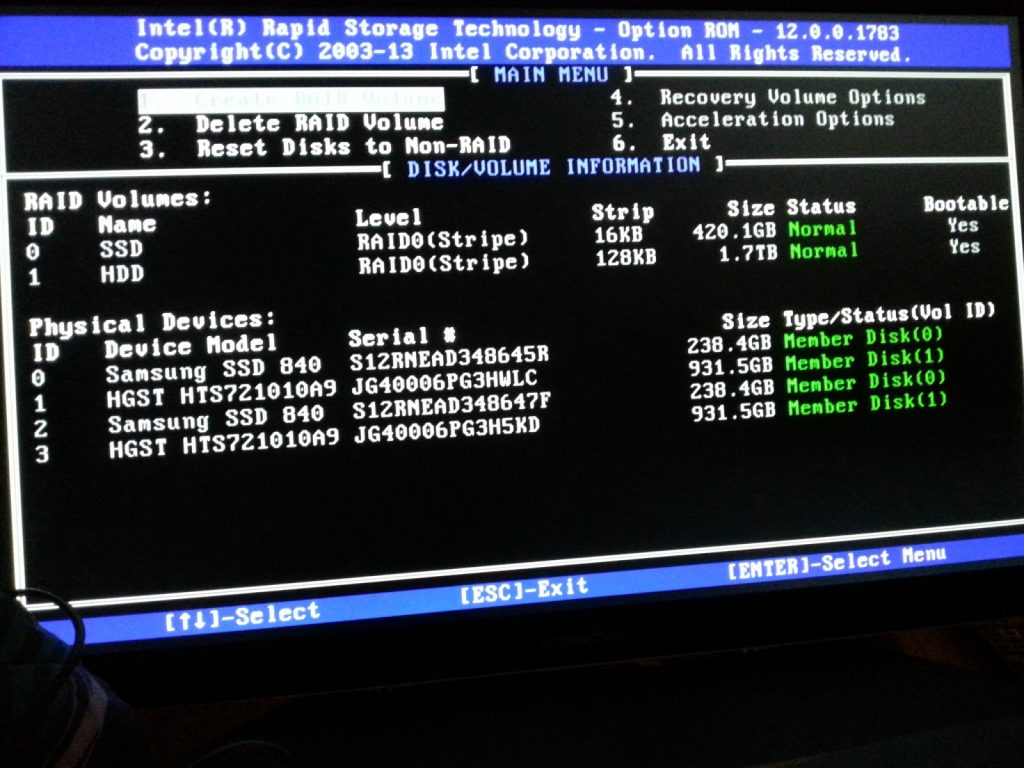
The RAID will be healthy and we can boot into Windows (Not yet from the recovered volume!)
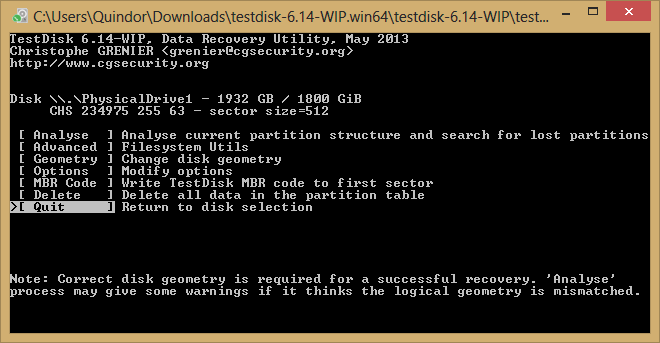
Exit the Configuration Utility
Recovering the Windows Partition
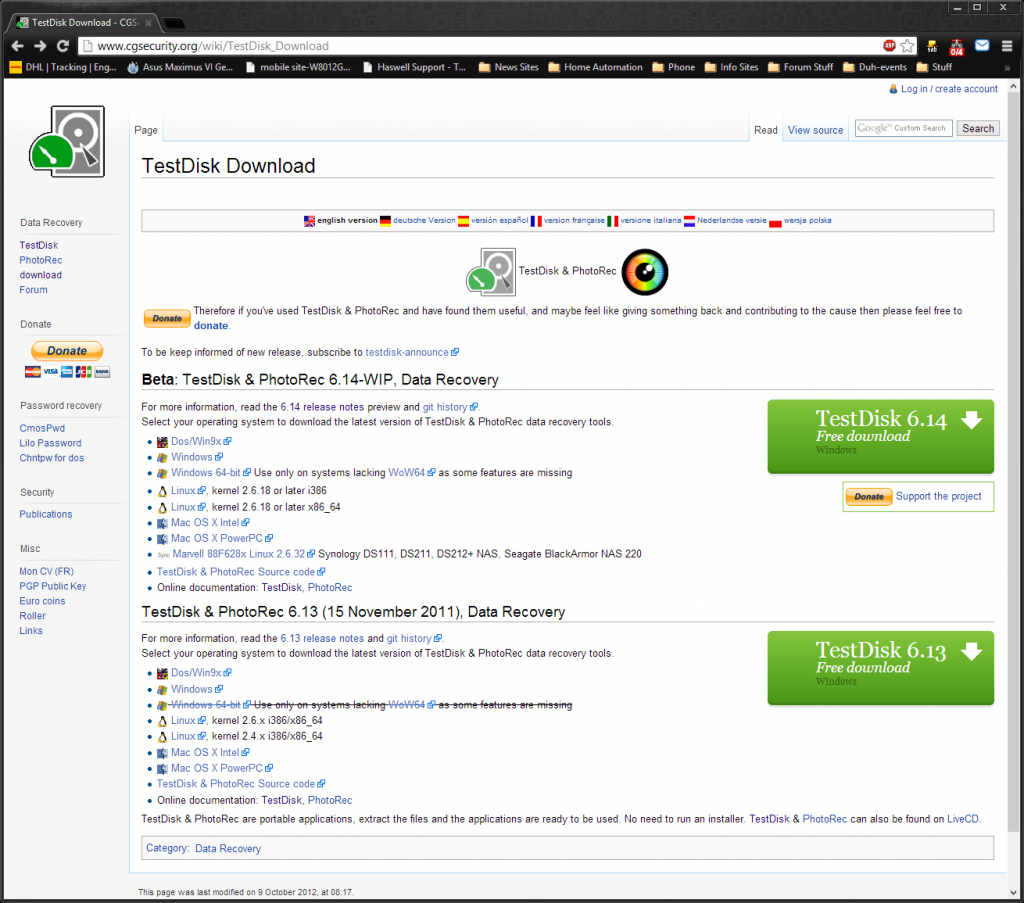
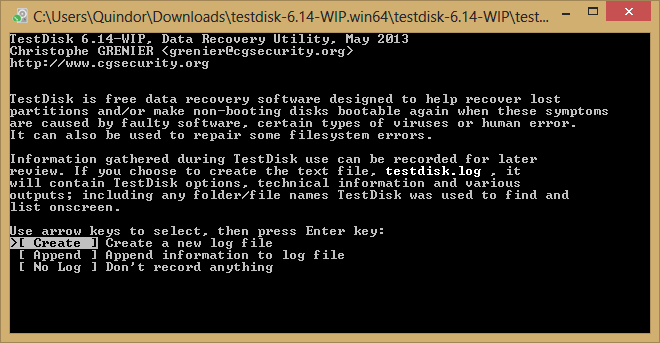
Now that we have restored the RAID configuration we will need to recover the partition in Windows. Sadly Windows itself does not have a tool for this so we will be using a little program called “TestDisk”. Cudos for creating this easy to use tool!
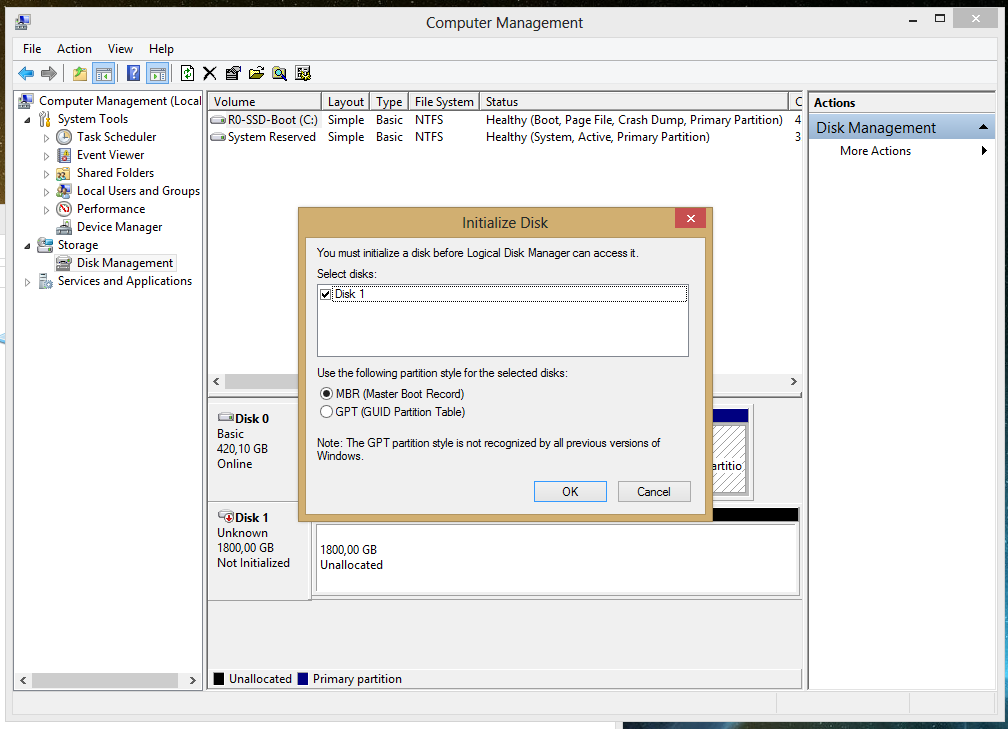
First thing, let’s open ‘Disk Management’ to check the status of our disks. Whatever you do, CANCEL the following pop-up!
Do NOTInitialize the disk! Hit Cancel
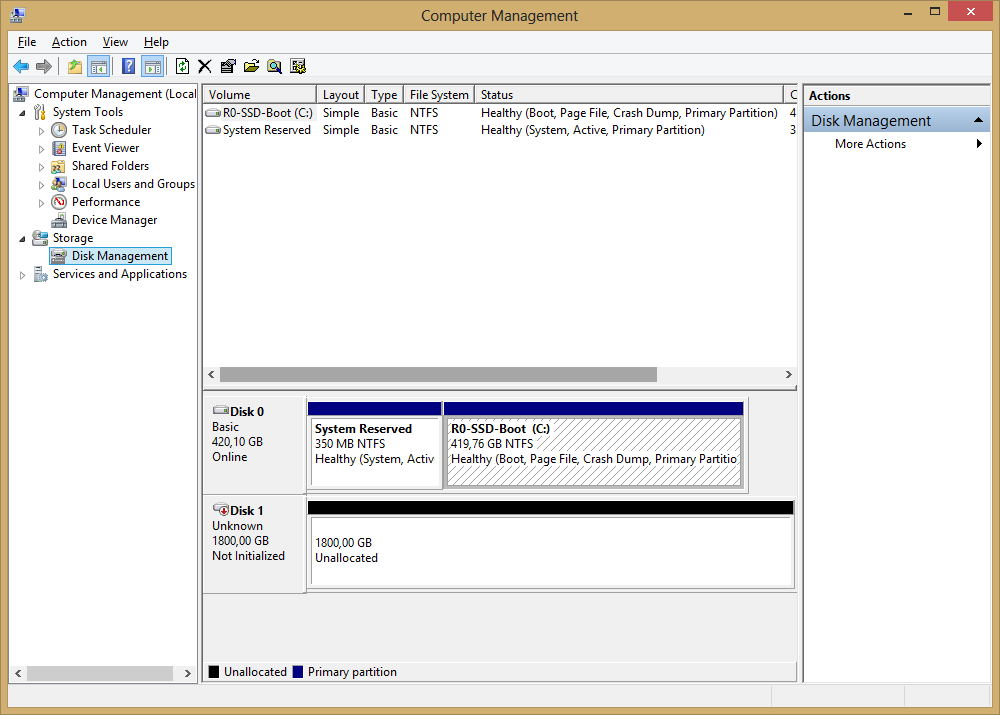
Here we see our restored RAID volume, but windows believes it to be empty, no partition information found
Download the “TestDisk” tool
Unzip it to a directory and run it
When it’s started you will be presented with the following interface, click “Create”
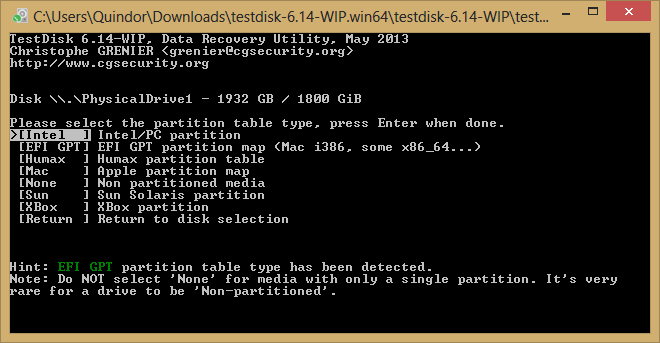
Select the correct volume to recover your information from, in our case the 1800GiB volume (Exactly the same size as in the Intel Configuration Utility)
Select the type of partition that you had created on your volume. Basically the following guidelines can be used ‘Intel is common for less then 2TB’. Anything above 2TB is usually a ‘EFI GPT’ volume.
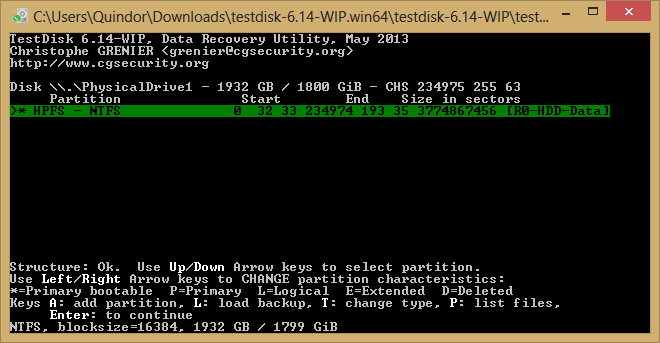
Have it analyze your disk for a lost partition
Click “Quick Search”
Because no data was really overwritten it will find our partition in only a few seconds! Select it and hit “Enter”
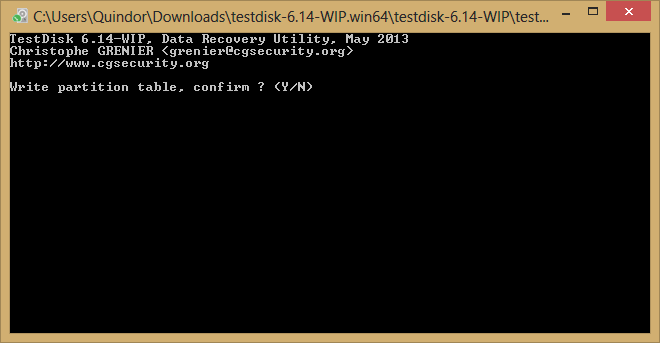
When this screen appears, click “Write” to write the found partition information back to disk
Are we sure? Yes we are! 😀
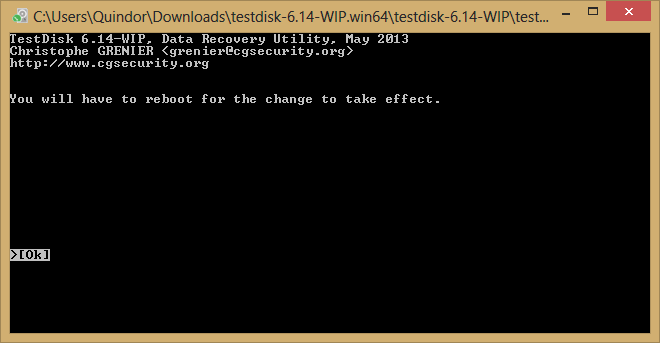
Hit Ok
And exit the application and then reboot
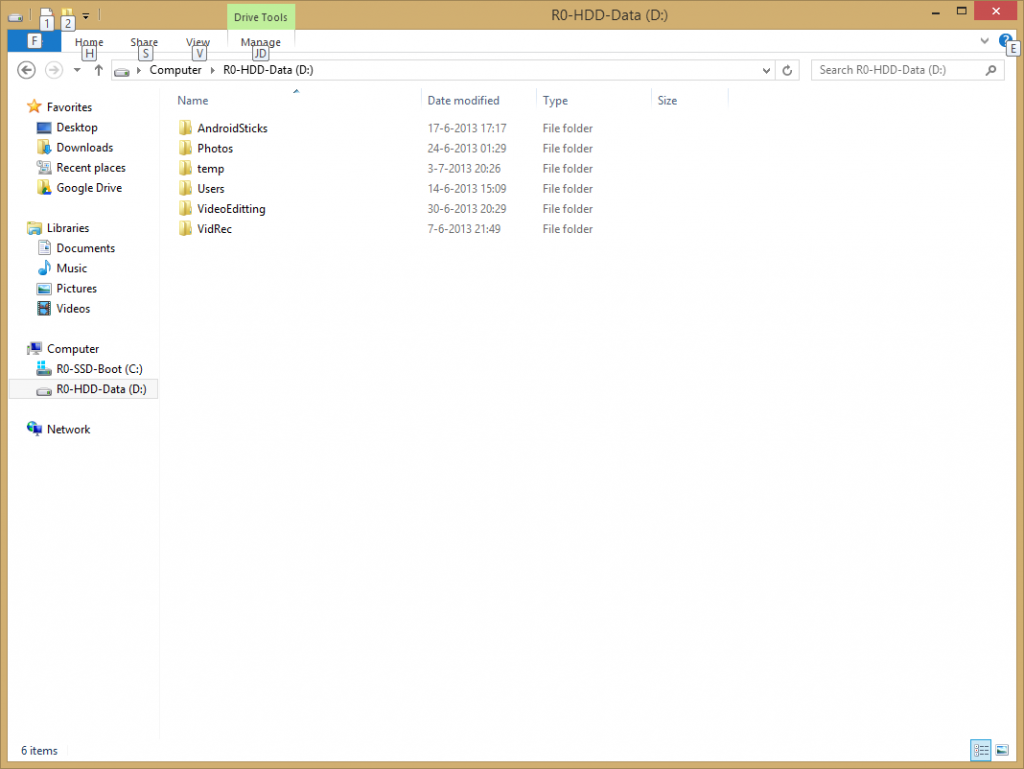
After rebooting we are presented with both drives I had before, the label of the disks is the same as before losing it
And voila, all files visible, and it should all be intact! Mission successful
And that is it. Your drive and volume and most importantly data is back, intact, without corruption. As said above, for me this happens when the BIOS gets reset and the default AHCI is selected. But luckily this easy way to recover it exists!