After creating a timelapse method using FFmpeg and after that using VLC a new method was discovered by one of my commentators. He dissected the firmware files and found that you can access an URL which then gives you a picture. This of course is the ideal way of generating pictures with a set time interval and I’ll walk you through the process in this post.
This description will be for a Windows based operating system. Instructions for a Linux based system should be almost the same though, so it might still be an interesting read.
First off we need to determine what we are trying to accomplish. In my example below we will try to get a new picture every 15 minutes. Meaning we want a picture at 00, 15, 30 and 45 minutes of every hour.
The URL that was discovered was the following:
http://172.24.8.24/cgi-bin/snapshot.cgi?stream=0
When opening this URL with a browser it will directly give you a snapshot of what the camera is currently seeing. Perfect for timelapsing!
To achieve this on Windows we will first create a batch file which will download this picture and save it using the current data&time to a jpg file. My batchfile uses a well known linux tool called wget, for windows you first need to download it. You can do so here. I placed it in c:windowssystem32 so that it automatically gets included in the PATH, alternatively you can put it somewhere else and link to it directly.
For me, using an 24Hr time setting in Windows the following batchfile works:
set DATESTAMP=%DATE:~9,4%_%DATE:~6,2%_%DATE:~3,2%
set HR=%TIME:~0,2%
if “%HR:~0,1%” equ ” ” set HR=0%HR:~1,1%
set TIMESTAMP=%HR%_%TIME:~3,2%_%TIME:~6,2%
set DATEANDTIME=%DATESTAMP%_%TIMESTAMP%
@echo Today’s date is %DATESTAMP%
@echo The local time is %TIMESTAMP%
@echo Date and time: %DATEANDTIME%
wget http://172.24.8.24/cgi-bin/snapshot.cgi?stream=0 –output-document=F:TimeLapseOutputPerQuarter_xxxxPerQuarter_xxxx-%DATEANDTIME%.jpg
–Update 2015-02-10
I have re-written the scripts a while back and also created Linux and Windows variants. What I have been using up until now is below. You can use the timeout value to determine how many pictures you are going to get. I have also added a read-timeout. Also, I have noticed that the camera’s are not foolproof and sometimes hang (the web interface, the RTSP stream always continues) so I have set all my camera’s to reboot once a day (somewhere during the night) and this has basically resolved the issue for me.
:begin
set DATESTAMP=%DATE:~9,4%_%DATE:~6,2%_%DATE:~3,2%
set TIMESTAMP=%TIME:~0,2%_%TIME:~3,2%_%TIME:~6,2%
set DATEANDTIME=%DATESTAMP%___%TIMESTAMP: =0%

@echo Today's date is %DATESTAMP%
@echo The local time is %TIMESTAMP: =0%
@echo Date and time: %DATEANDTIME%
wget --timeout=15 --connect-timeout=5 --read-timeout=10 http://IP.IP.IP.IP/cgi-bin/snapshot.cgi?stream=0 --output-document=d:TimeLapseOutputExampleDirExampleName-%DATEANDTIME%.jpg
timeout 6
goto begin
The end output will be something like: PerQuarter_xxxx-2013_10_28_05_15_00.jpg . It should automatically sort in explorer which is important when we later wish to use it to generate a timelapse.
Now this script does not run automagically, for this I use the Windows scheduler which automatically runs the script at the set times. Depending on your needs you can set it up. Since the script will generate filenames with seconds in the name the maximum speed you can take pictures is every second. I don’t know if the camera is able to do that though, so I would recommend something a little bit more sane such as a 5 second minimal interval.
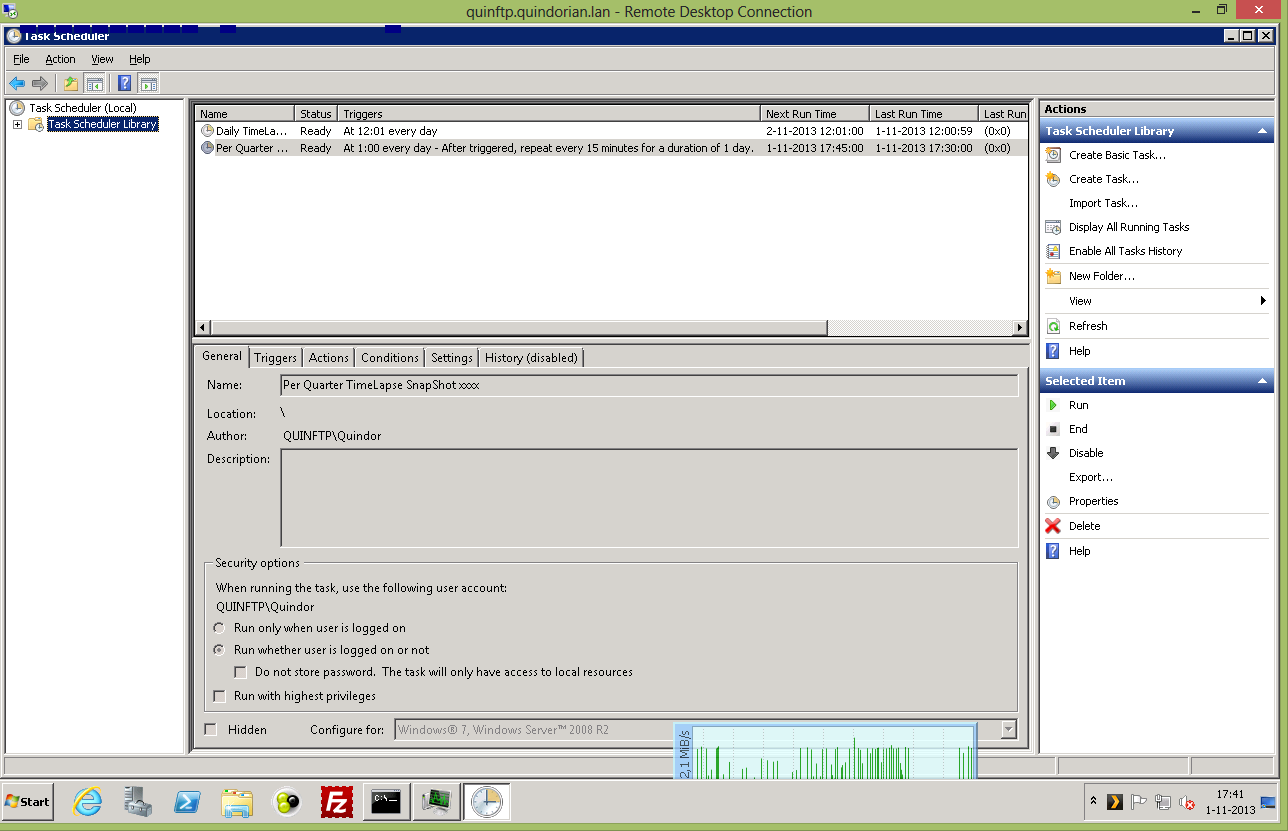
To achieve a 15 minute interval in the Windows 2008 R2 scheduler you need to take the following steps:
Open Task Scheduler in Windows 2008 R2 and select “create task”
Enter the following settings and go to the next tab
Create a new schedule and enter the following settings to create a picture every 15 minutes
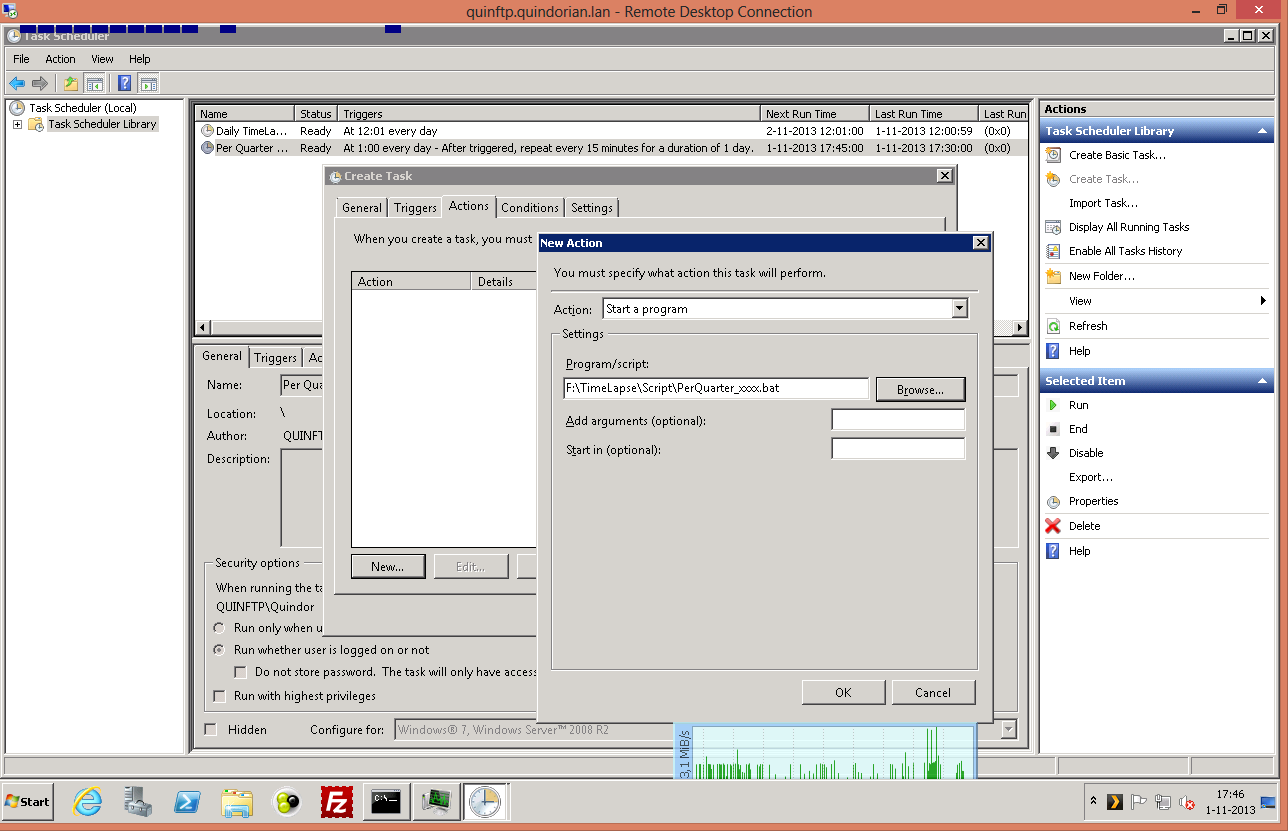
On the next tab, select the program that should be run
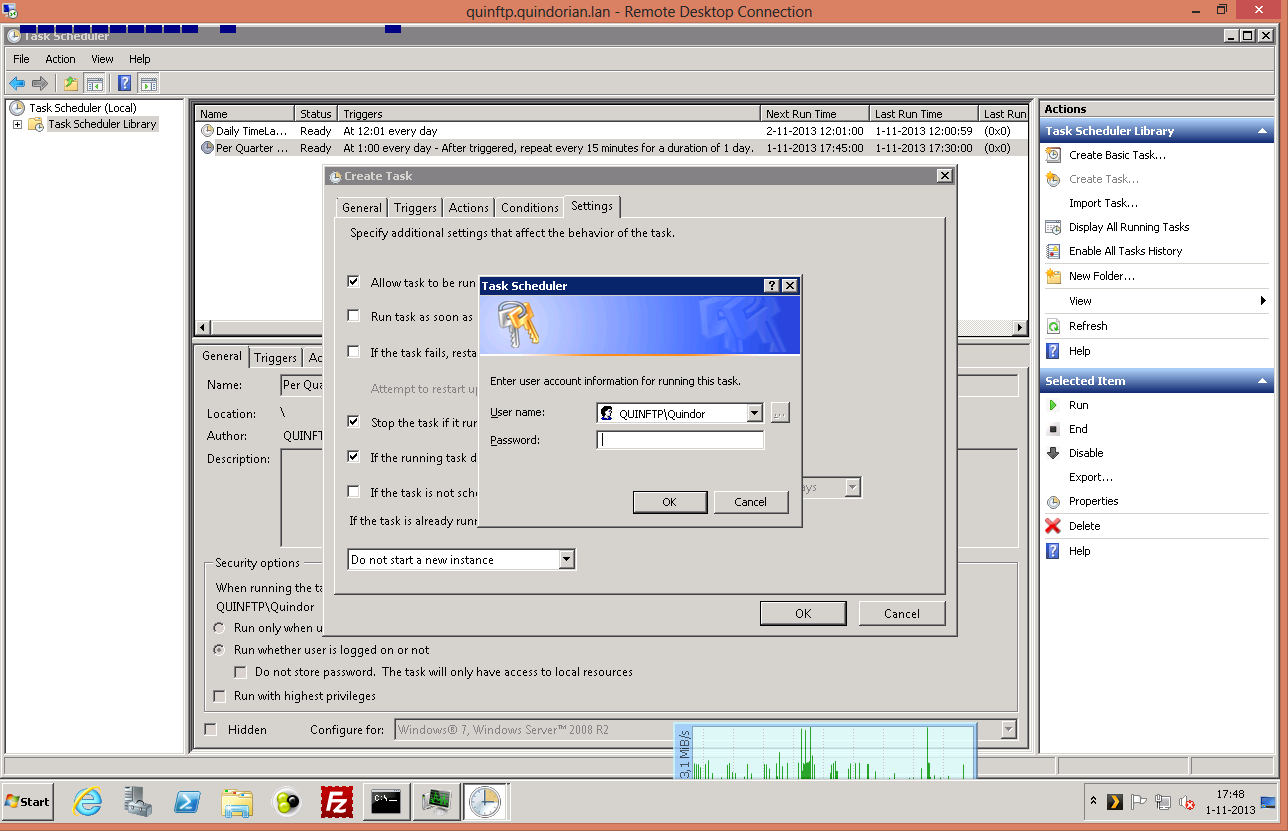
The next tabs don’t need anything changed. When you click OK it should ask you for your password so that the job can run independently of you being logged in or not
That’s it! Now Windows will start the batch file every 15 minutes and create a new picture with the date and time in the filename.
For creating the actual timelapse I use the same method as described in the previous VLC guide. This is using the “Bulk Rename Utility” and after that FFmpeg. You can read how to do that in the following post, just scroll down to the part which says “Renaming the files for FFmpeg input”.