
Don’t have enough ports available in your (Storage/ESXi) server? Even though modern motherboards come with 6 onboard port now a days, maybe it’s not enough for you. Or you are using a little bit older hardware and don’t have enough 6G ports (Only important to SSD’s really). A quick and easy way is adding a PCIe based storage controller. And while True Hardware RAID can be good to have, on lower end controllers it’s often more of a hindrance then a benefit. Especially when using something life software RAID or ZFS.
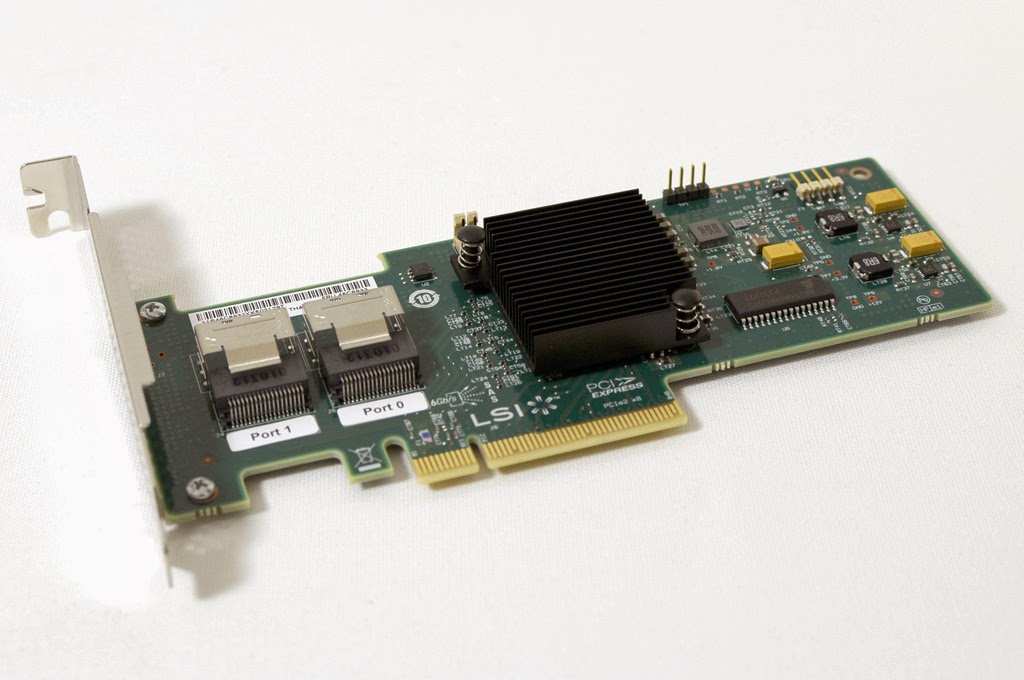
This guide will show you how to flash an LSI 9211-8i or 9220-8i / Dell Perc H310 / IBM M1015 to LSI IT firmware. IT stands for “Intergrated Target”. This way the disks get presented to the OS is a raw form, much like your motherboard ports would do. This enables complete control, SMART data for your OS and Power Management such as spindown. It will also help you if you encounter the “Failed to initialize PAL” error while flashing.
For me, FreeBSD (Running ZFSguru) would not even finish booting with the IR firmware installed. Thus the IT firmware is very much recommended doing anything in the form of Software RAID or ZFS.
Pre-Requisites:
To start, you will need a 4GB USB stick and please download the following files:
xxxxxxxxxxxxxx.7z (Compressed .img file to write to USB stick)
winimagewriter.7z (Tool to write .img file to USB stick)
The image contains a bootable installation of FreeDOS and the LSI tools and ROM you will need are included. At the time of writing the newest ROM available is R17. You can use that one or get the newest version from the LSI website.
Use the WinImageWriter tool to write the extracted .img file to your USB stick. It should now be bootable automatically. **winimage screenshot**
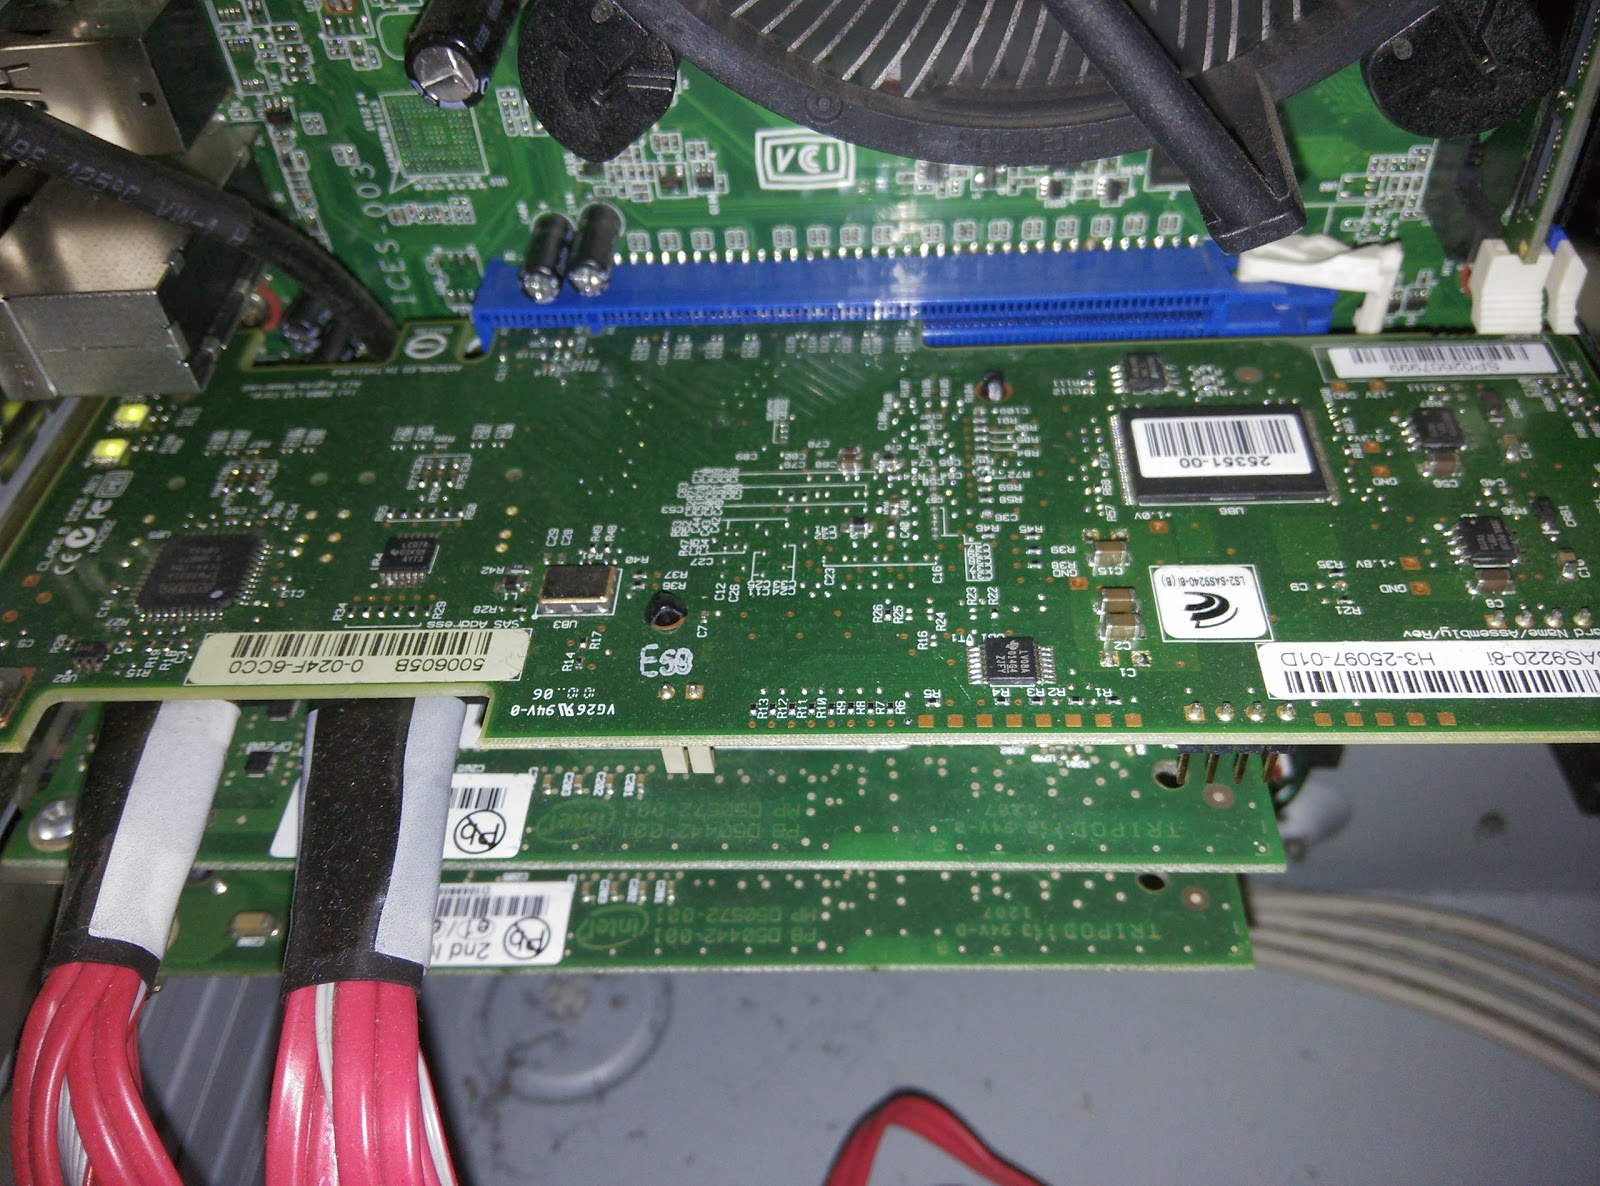
Now prepare your system. Disconnect all of it’s drives and any other storage controllers. This isn’t ‘necessary’ but it’s just a precaution to prevent anything from going wrong. Also make sure no storage is connected to the controller.
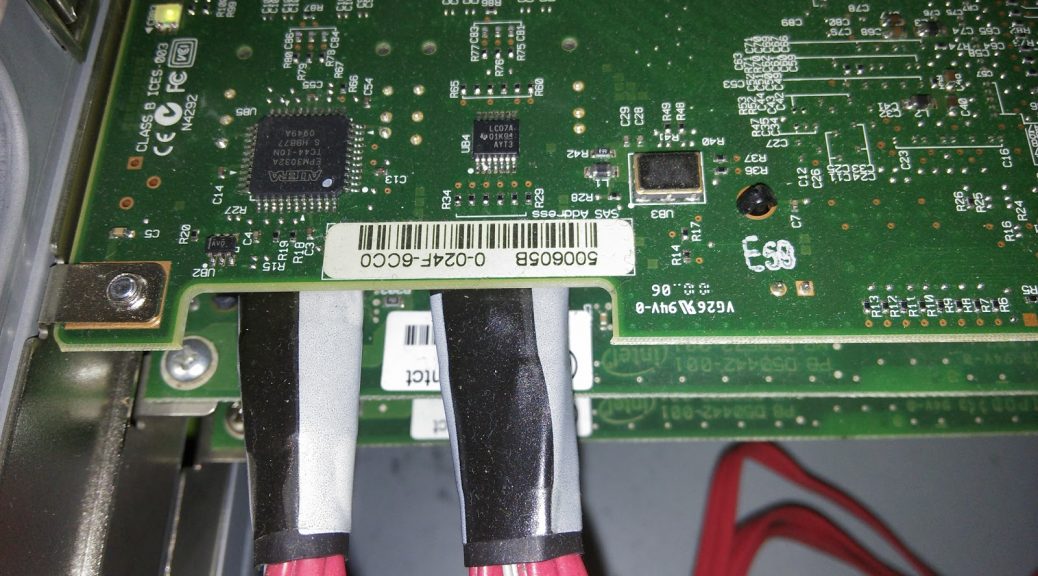
While doing this, also make note of the green label on your LSI/Dell/IBM controller. This is your SAS ID which we will need later.

Clearing the Controller:
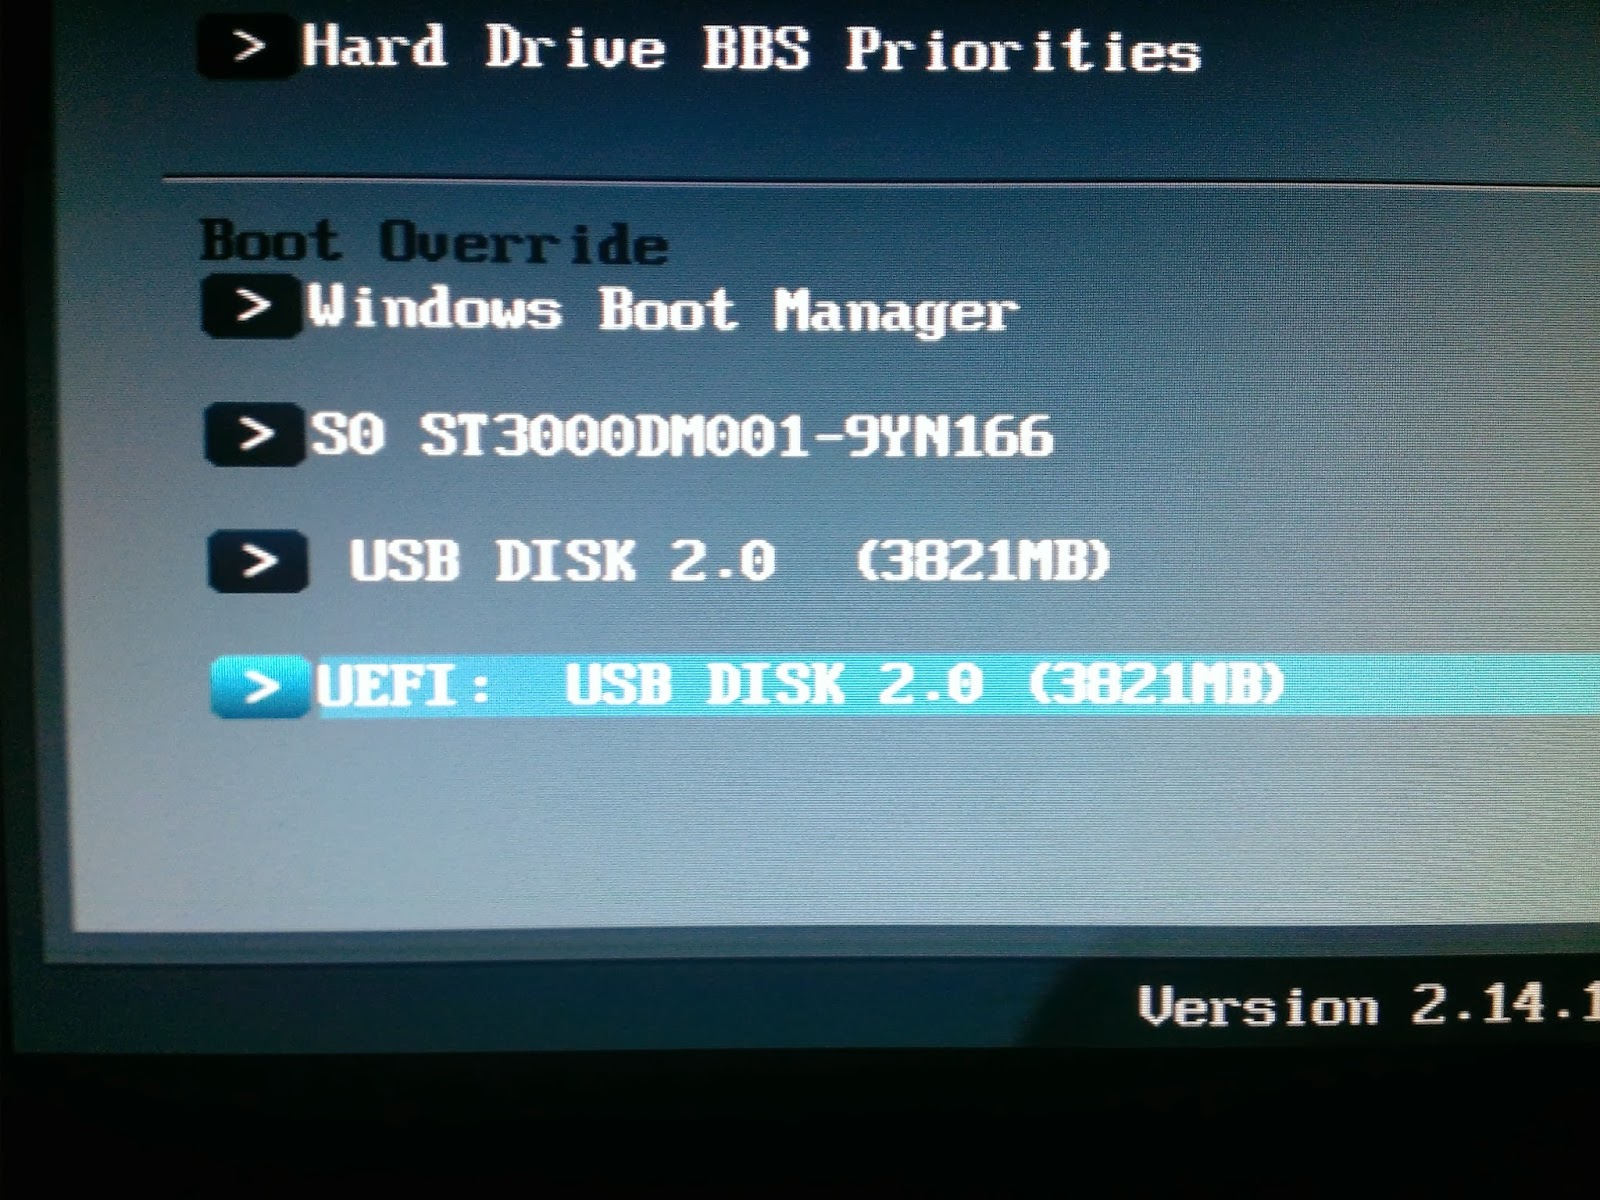
When done, boot from the USB Stick. Mostly this can be done by using F8 or F12 during the System BIOS boot.
Once you are greeted with the FreeDOS screen proceed with the following:
megarec -writesbr 0 sbrempty.bin
megarec -cleanflash 0
This erases the current controller firmware and controller BIOS. It will be unsuable after this, but we will soon fix this.
Reboot your system now.
Reflashing the Controller:
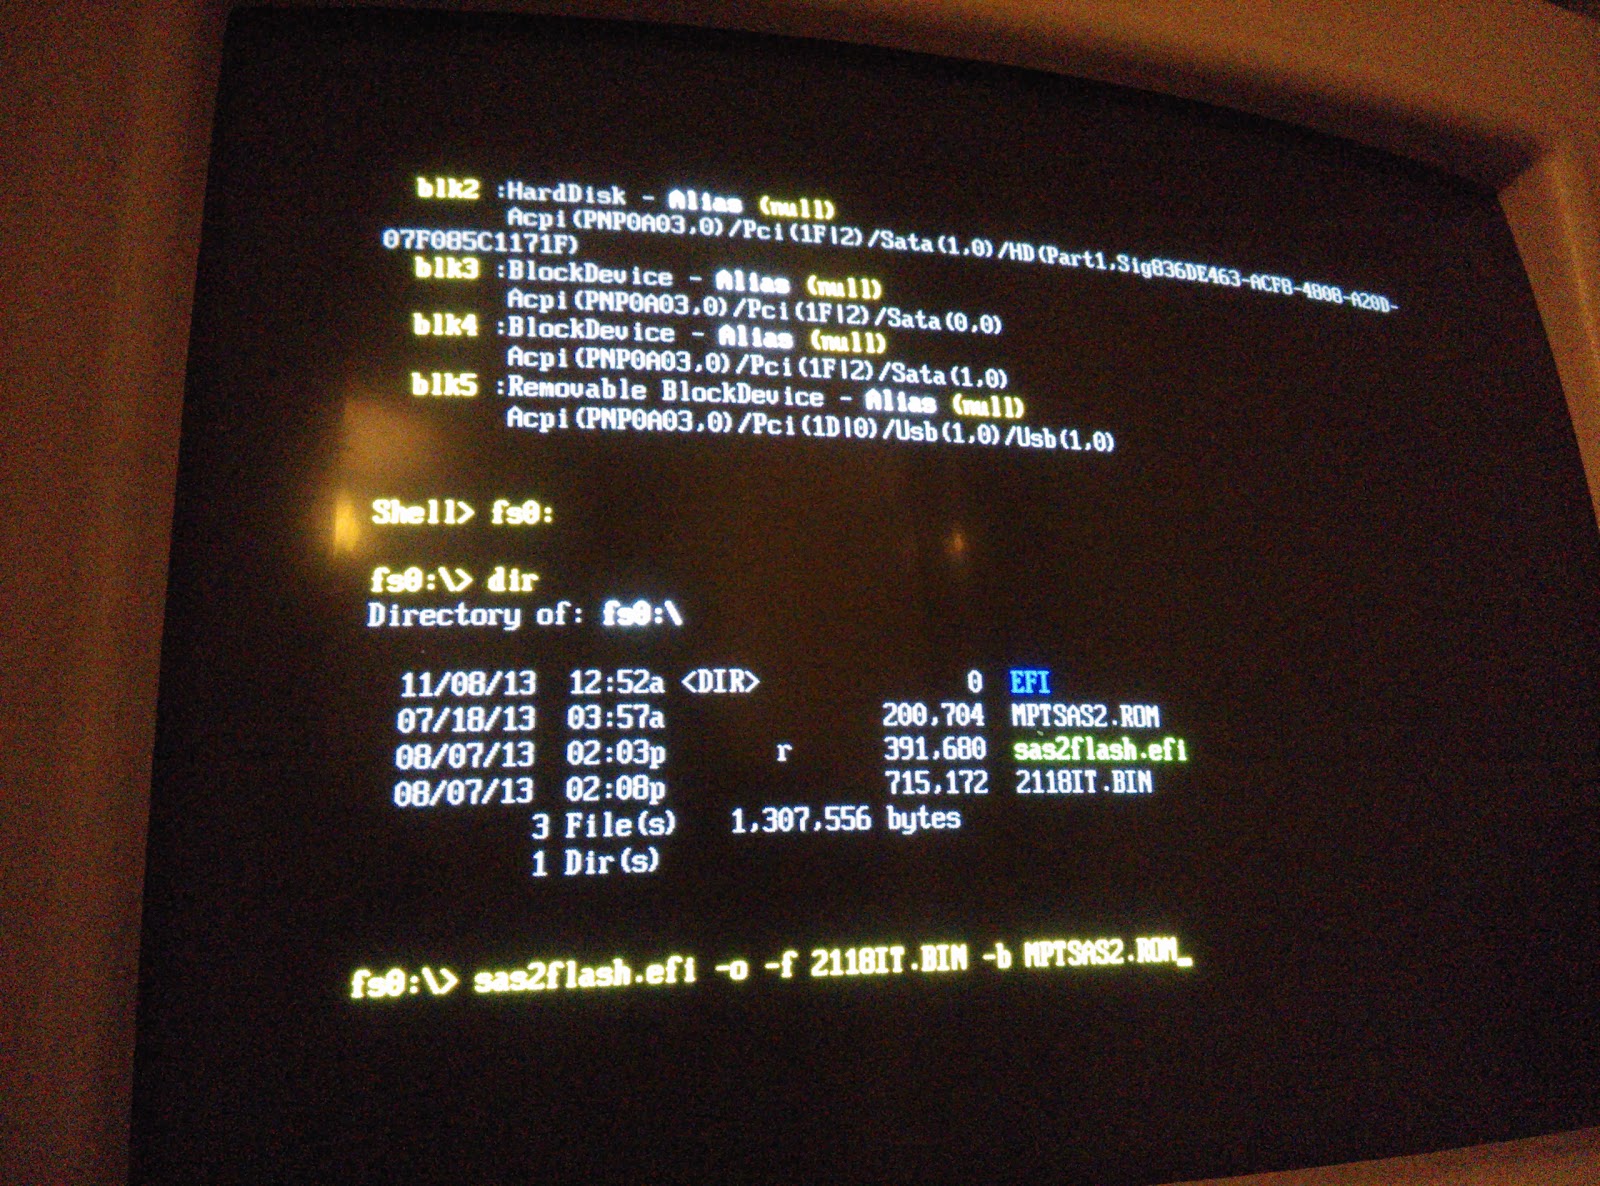
Boot into FreeDOS again, when that is done type:
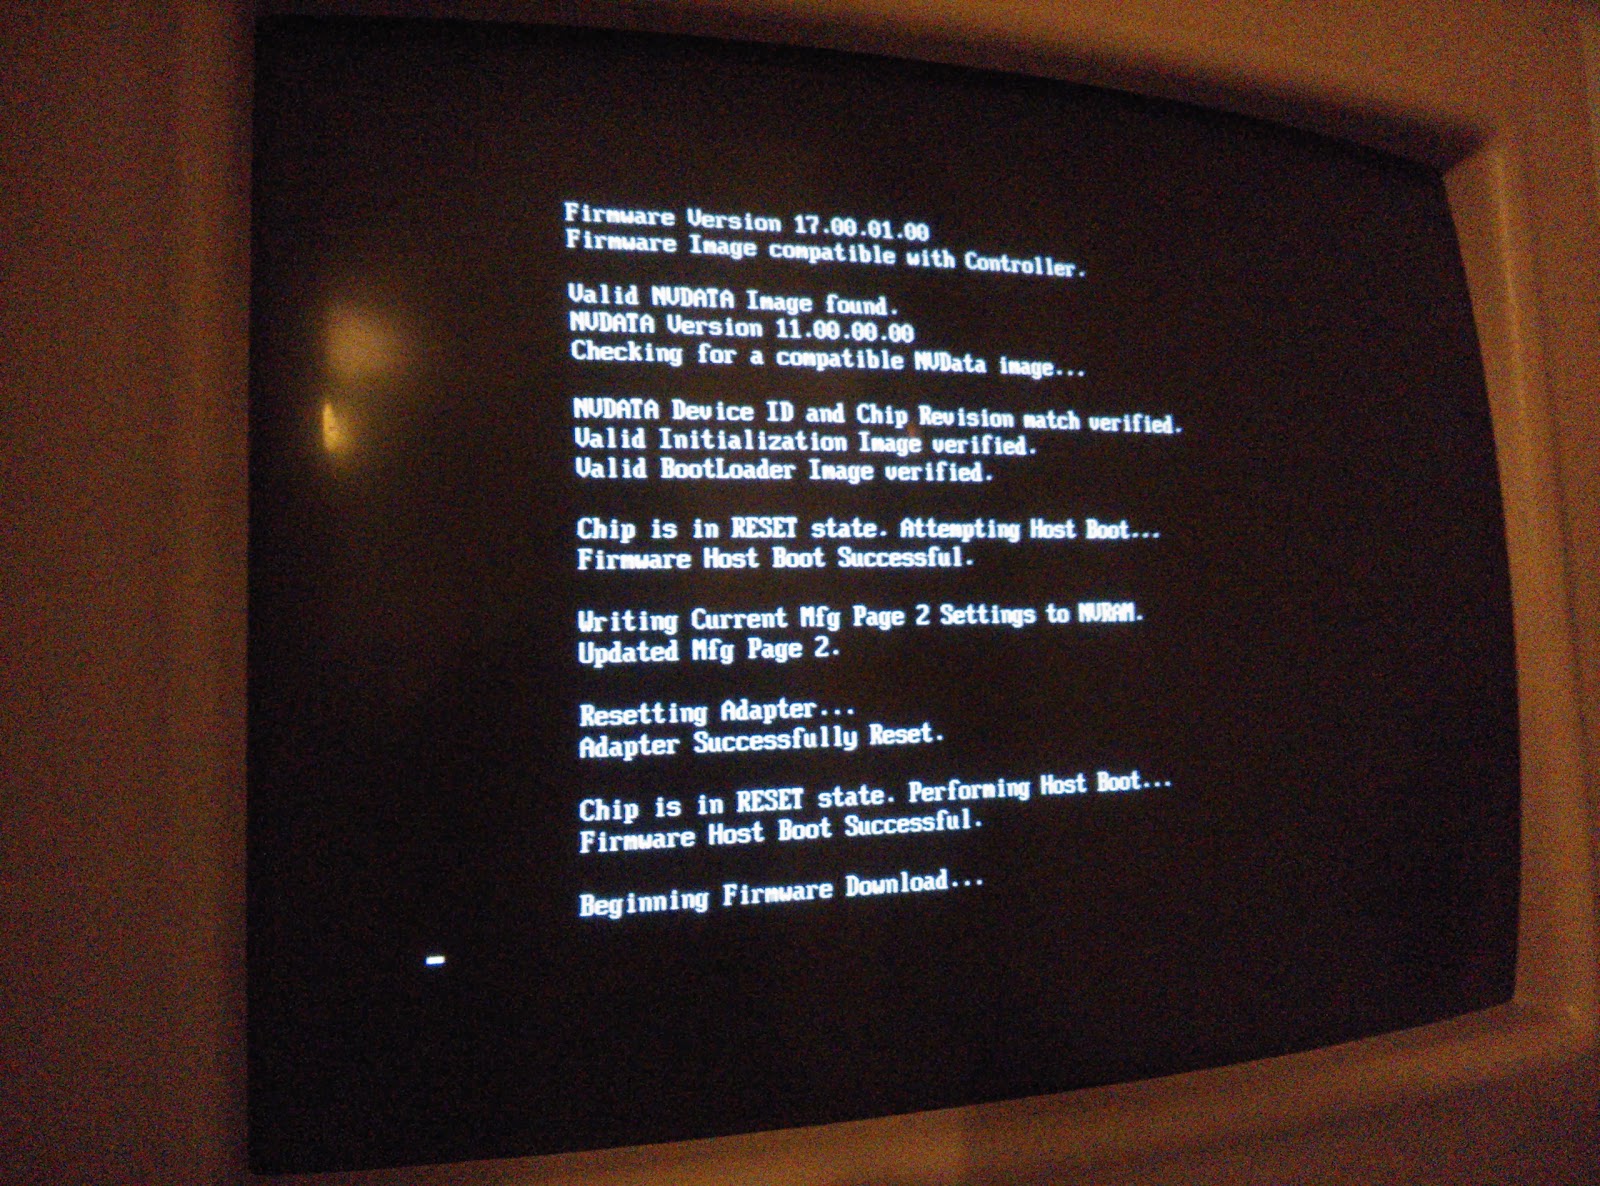
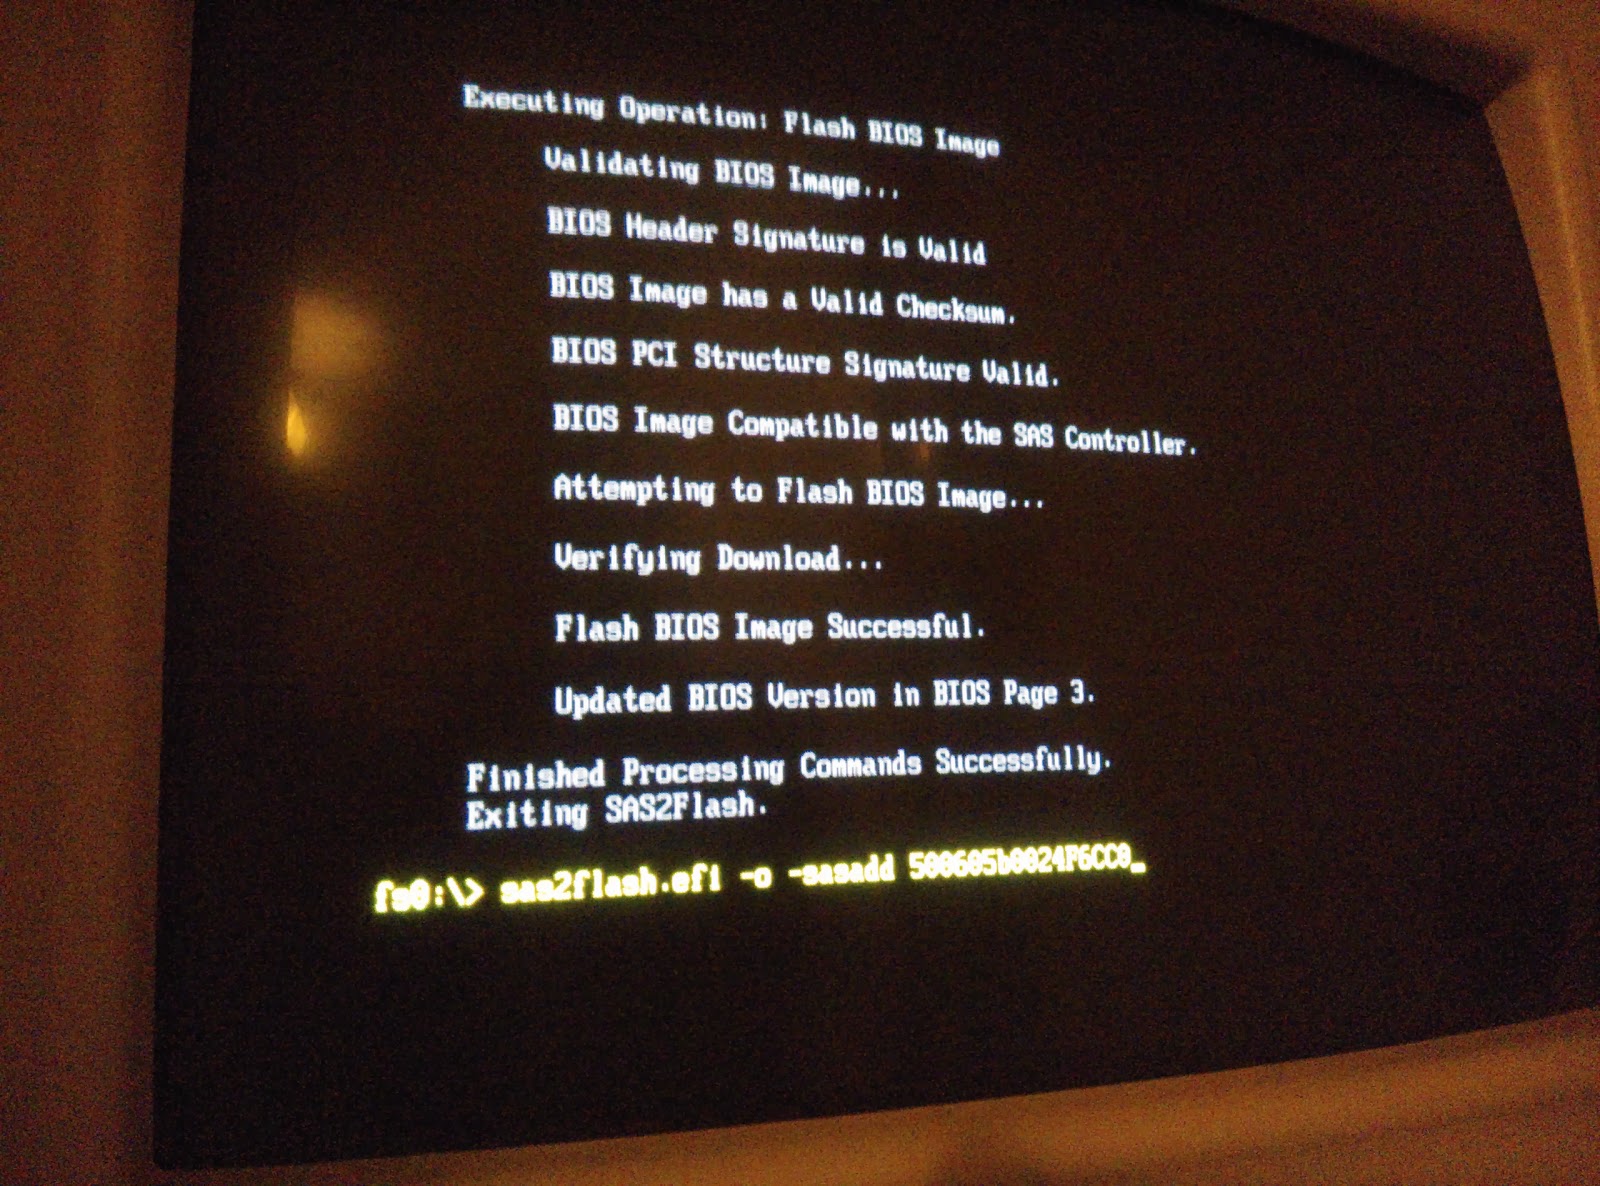
sas2flsh -o -f 2118it.bin -b mptsas2.rom
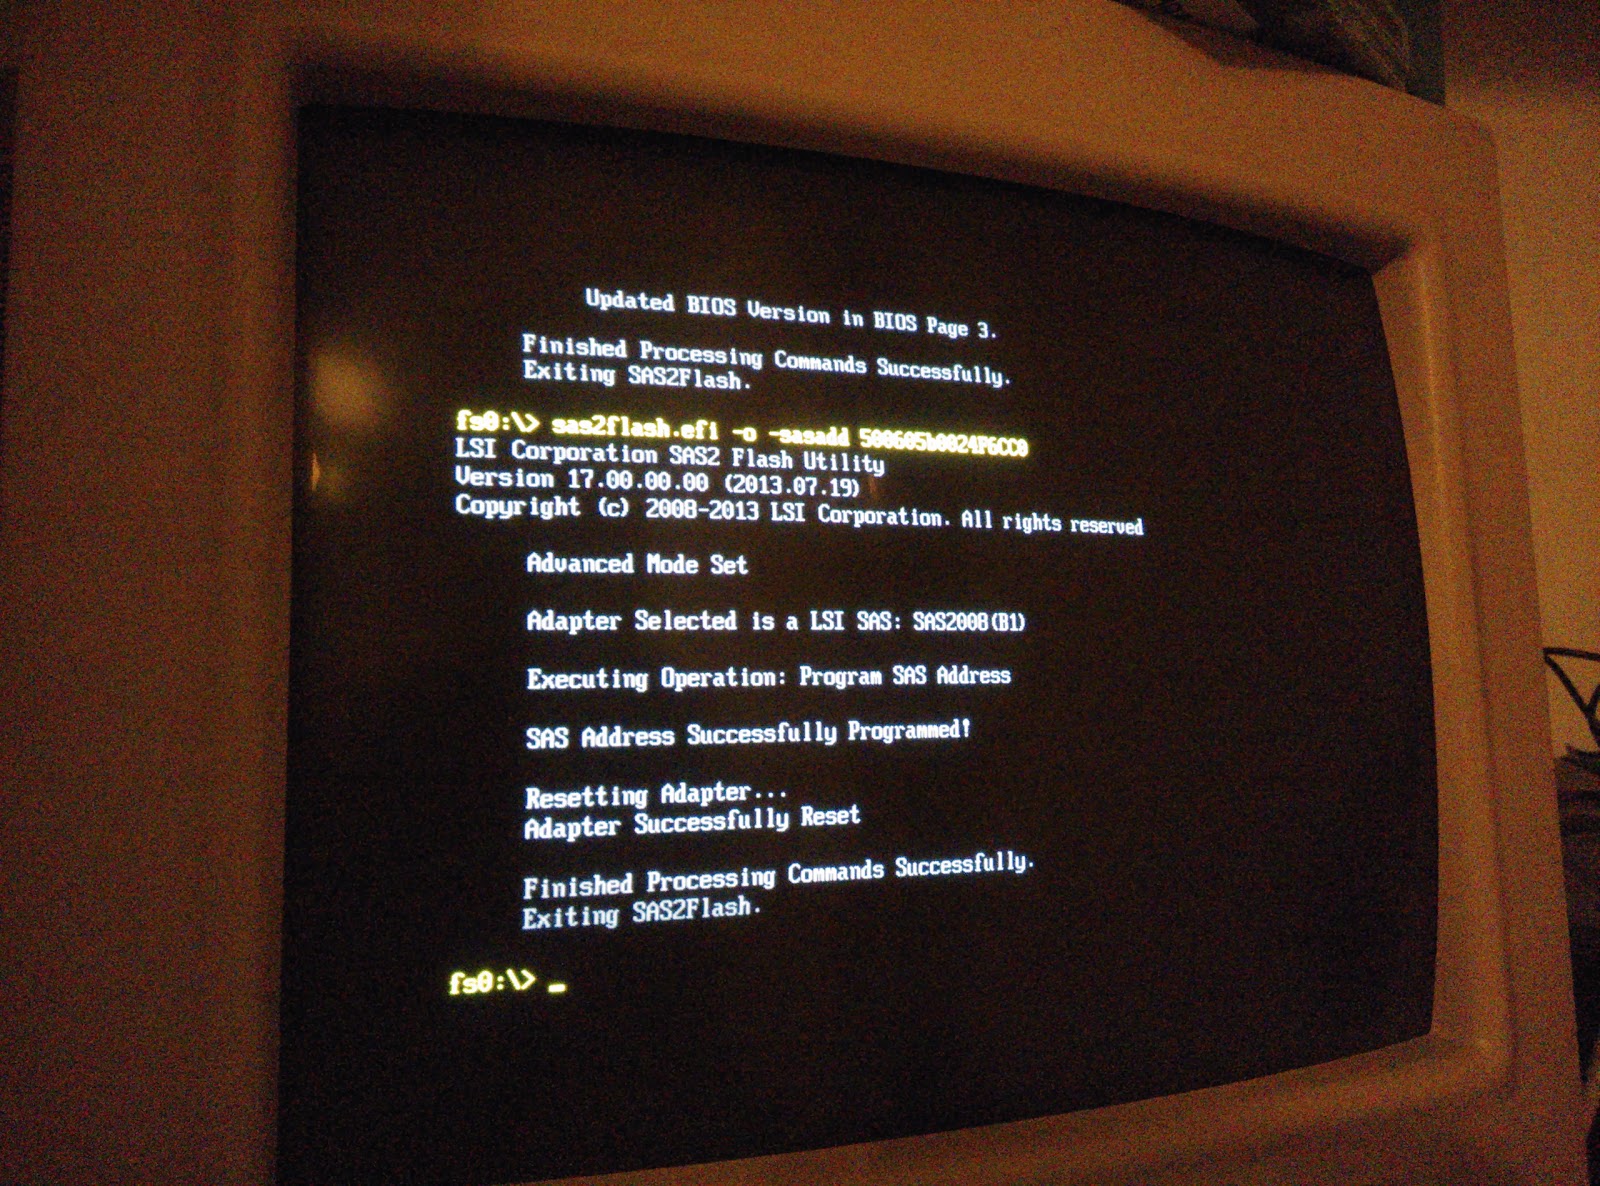
sas2flsh -o -sasadd 500605bxxxxxxxxx
The SAD ID (500605bxxxxxxxxx) is the number you read from the green sticker on your controller. This number is unique per controller and you need to make sure you use your own number!
This flashes the 2118it.bin controller firmware and the mptsas2.rom controller BIOS. Optionally you can opt to not flash the BIOS (mpt2sas2.rom) to the controller making booting your system a bit faster.
Error: ERROR: Failed to initialize PAL. Exiting program
For me however, this procedure did NOT work. Newer systems feature something called an UEFI BIOS which seemingly prevents this kind of flashing from DOS. So… now what?
Well, we can actually use this UEFI as a form of command prompt/DOS and flash the controller from there.
To do this, boot into your BIOS and you should find an UEFI boot option for the USB stick. I have prepared it in such a way that it should show up. It should look something like this:


Hehheh 🙂 "When done, but from the USB Stick"
But but? Mooie Engrish 🙂
Hi
where are the links for the software
moz@moztronics.com.au